

If you’ve got a paid tier on Substack but almost nobody’s upgrading, the problem usually isn’t your offer: It’s that visitors can’t see it.
This post is for creators who already have a clear direction with their publication: Coaches, consultants, educators, experts, people with real knowledge to share and a clear sense of who they’re serving.
If you’re still figuring out who your paid tier is even for, this isn’t the thing to focus on yet. But if you already have expertise, resources you can repurpose from other channels, or a publication that’s converting slower than you hoped, this is one of the highest-leverage things you can set up right now.
Your paid tier has been a sign on the door, not a shop window
Here’s the part most creators underestimate about their paid tier: A first-time visitor makes the decision to pay you in seconds. And until recently, Substack gave you almost no room to help them make that decision because all we had was the default subscribe page:

On the standard subscribe page, a visitor sees a short list of benefits, a price, and a subscribe button. That’s it.
The list says something like “access to weekly articles, community chat, exclusive Q&As,” and the reader can’t picture what any of it looks like.
They can’t tell what they’d get today versus 6 months from now, and they can’t tell whether they’d even like it. So they close the tab.
That’s the real cost of the old setup: You could have the most valuable paid offering in your niche, and it wouldn’t move a single upgrade, because nobody browsing your page can see it.
With Perks, we now have an additional opportunity to convert people by highlighting the real value they’re paying for when they become premium members.

Perks is a new native tab on your publication that shows every paid reward you offer as a visual card: An image, a title, a short description, and a button to claim it.
A paid member who lands there gets the code, the link, or the download on the spot.
A free subscriber sees the same cards with a prompt to upgrade.
So the same page works as both a benefits page for the members you already have and a sales page for the ones you don’t.
The strategic part is the gating.
You can attach specific perks to specific tiers. Some go to every paid member, some to annual and founding only, some to founding alone.
This means every tier finally has a distinct, visible, tangible reason to exist.
That’s the big shift: Your paid tier stopped being a description on a sign. It’s a lit shop window now, with the products in view.
Every tier needs its own promise, not just its own price
That shop window only works if there’s something different in each part of it. And this is where most paid models quietly fall apart: Charging different prices for the same thing is one of the fastest ways to stall your conversions.
Most creators launch with a monthly price and an annual price, and behind both, the same offer: Access to paywalled articles, maybe a private chat.
The annual tier is just a small discount.
The founding tier, if it exists at all, is basically a donation box.
That’s rarely a model anyone rushes to upgrade into, and to be fair, it was hard to build anything better before Perks existed.
Now you can structure tiers around access and transformation instead of price, and make each level visible.
There’s no single right answer here: How you structure your tiers depends on what you already have, how your content is built, what your existing offers look like, and what stage you’re at.
Someone 3 months in makes very different calls than someone with a 5-year archive and a full course library. So take what follows as a menu, not a formula.
Here’s the general shape that works for most educational publications:
Your monthly tier is the entry level.
Keep it accessible enough that a curious reader says yes without much friction: Access to your paywalled articles, maybe one rolling perk you rotate every month or so. It’s a low-friction invitation to keep exploring your world.
Your annual tier is where you concentrate the substantial resources.
Courses, template packs, resource libraries, an ebook, cheat sheets, the guides that took you weeks to build. The annual tier should feel like the reader is claiming a whole body of work, not just a longer subscription.
Your founding tier is where you put personal access or your highest-leverage product.
Founding members want to go deeper with you specifically, so this is where DM access, coaching calls, private sessions, or an exclusive high-ticket product make the most sense.
At Write • Build • Scale, we’re revamping our founding tier right now to include a personalized audit, where we show a Substacker exactly what’s holding their publication back and what to change to build toward Bestseller.
We made that call because we recently published a few audits we’d done for private coaching clients, and readers loved them. It’s an asset creators will happily pay for, so it’s going into founding.


That same tier could just as easily be built around one product, a full course, or a private cohort. Whatever your highest-leverage offering is, that’s usually what belongs there.
The principle underneath all of it: Tiers aren’t about price, they’re about PROMISE.
Every level should give the reader a concrete answer to what they get by taking one more step with you. Perks is the tool that finally lets you answer that visually.
But structuring tiers is only half of the free-to-paid problem, and it’s the half most creators guess at.
Our Substack Free-to-Paid Playbook is packed with 100+ tested strategies for turning free readers into paying members, filtered by subscriber stage, so you find the right move for exactly where your publication is right now.
The full setup, step by step
Once you know how you want to structure your tiers, building them takes about an afternoon. Before the walkthrough, one requirement: Perks only shows up for publications that already have payments enabled. No paid tier, no feature in your dashboard. That’s less a limitation than a signal. Perks is a monetization tool, so there’s nothing to gate until you’re monetizing.
If you’ve got a paid tier, here’s where to find it.
Go to your publication dashboard, click into Settings, then Payments. Scroll past the tier descriptions and you’ll find a section called Subscriber Perks.
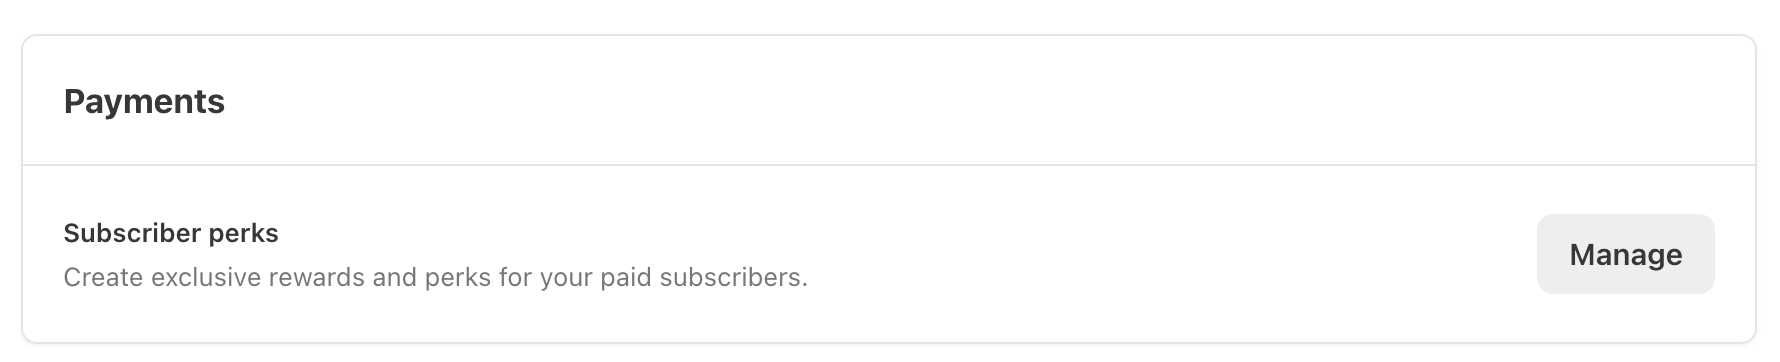
Click Manage. You’ll see any perks you’ve already made and a button to create a new one.
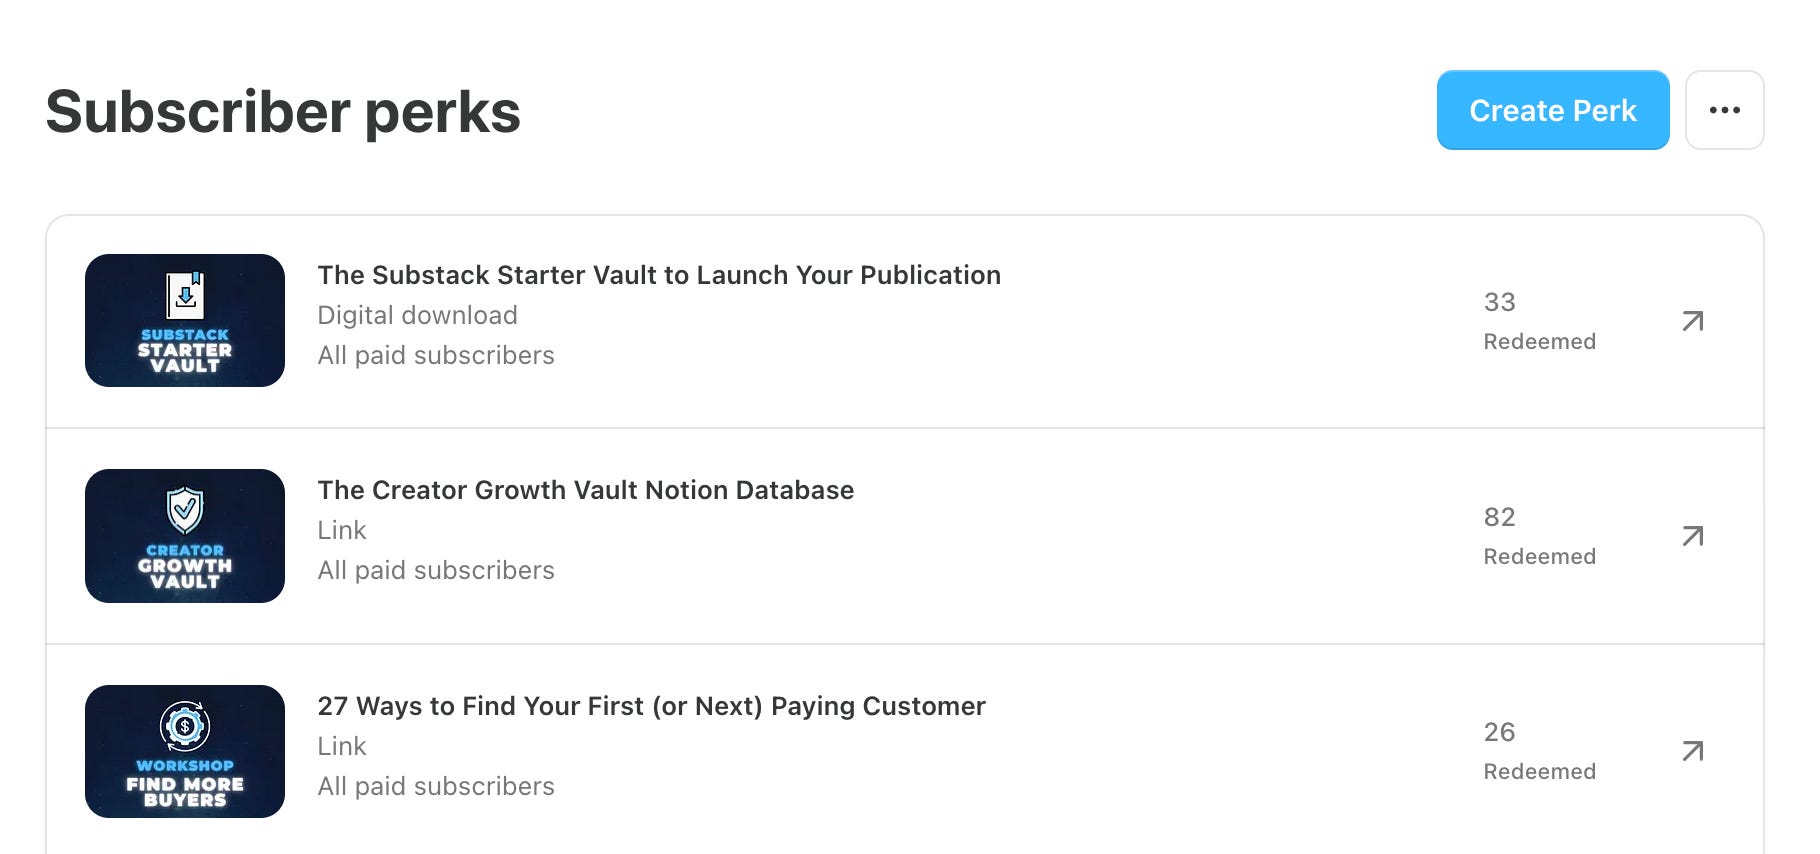
Click Create Perk, and Substack walks you through 3 steps.
Step 1: Choose the perk type
You get 5 options, each with its own use case.
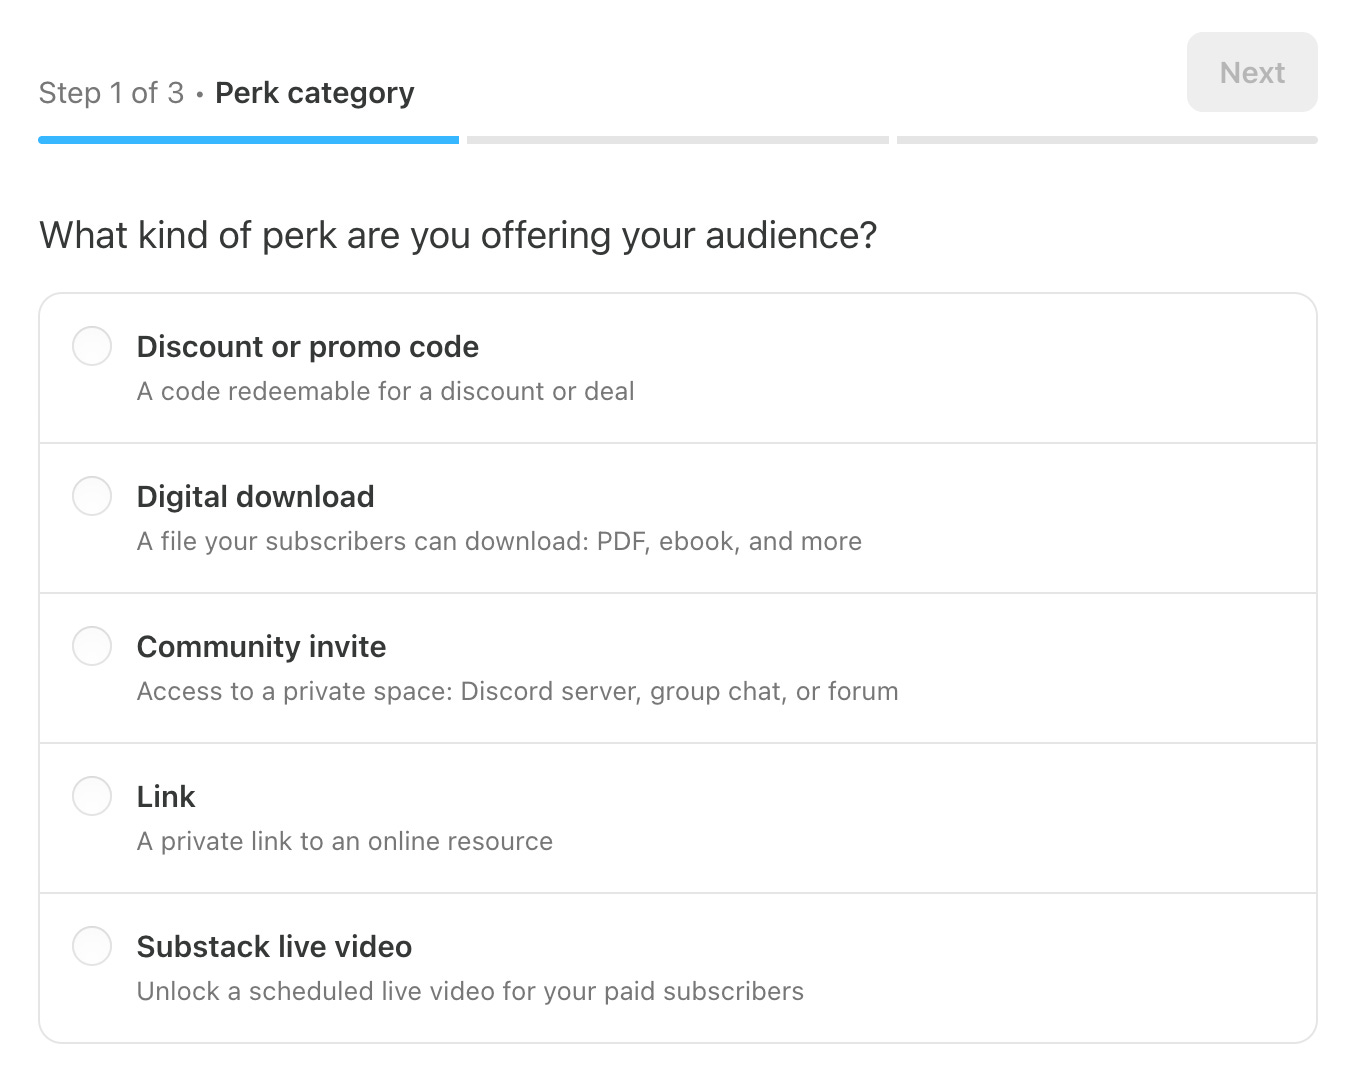
Discount or Promo Code is a code your subscribers redeem somewhere else: A discount on one of your own products, a partner publication, a course, a coaching program. Anywhere a code applies.
Digital Download is Substack hosting an actual file for you. A PDF, an ebook, a workbook, a template pack. Subscribers get it straight from the Perks page.
Community Invite is a link to a private space you run elsewhere. A Discord server, a Circle community, a WhatsApp group, a private chat.
Link is the most flexible option, a private URL your subscribers get access to. Use it for anything that doesn’t fit the other categories: Private Notion pages, hidden Substack posts, resource libraries, custom landing pages.
Substack Live Video gates a scheduled Substack Live session for paid subscribers. If you run private lives or masterclasses on the platform, this is how you close them off.
Pick the one that fits, then move on.
Step 2: Write the perk content
Next, you’ll add a title, a description, and an image:
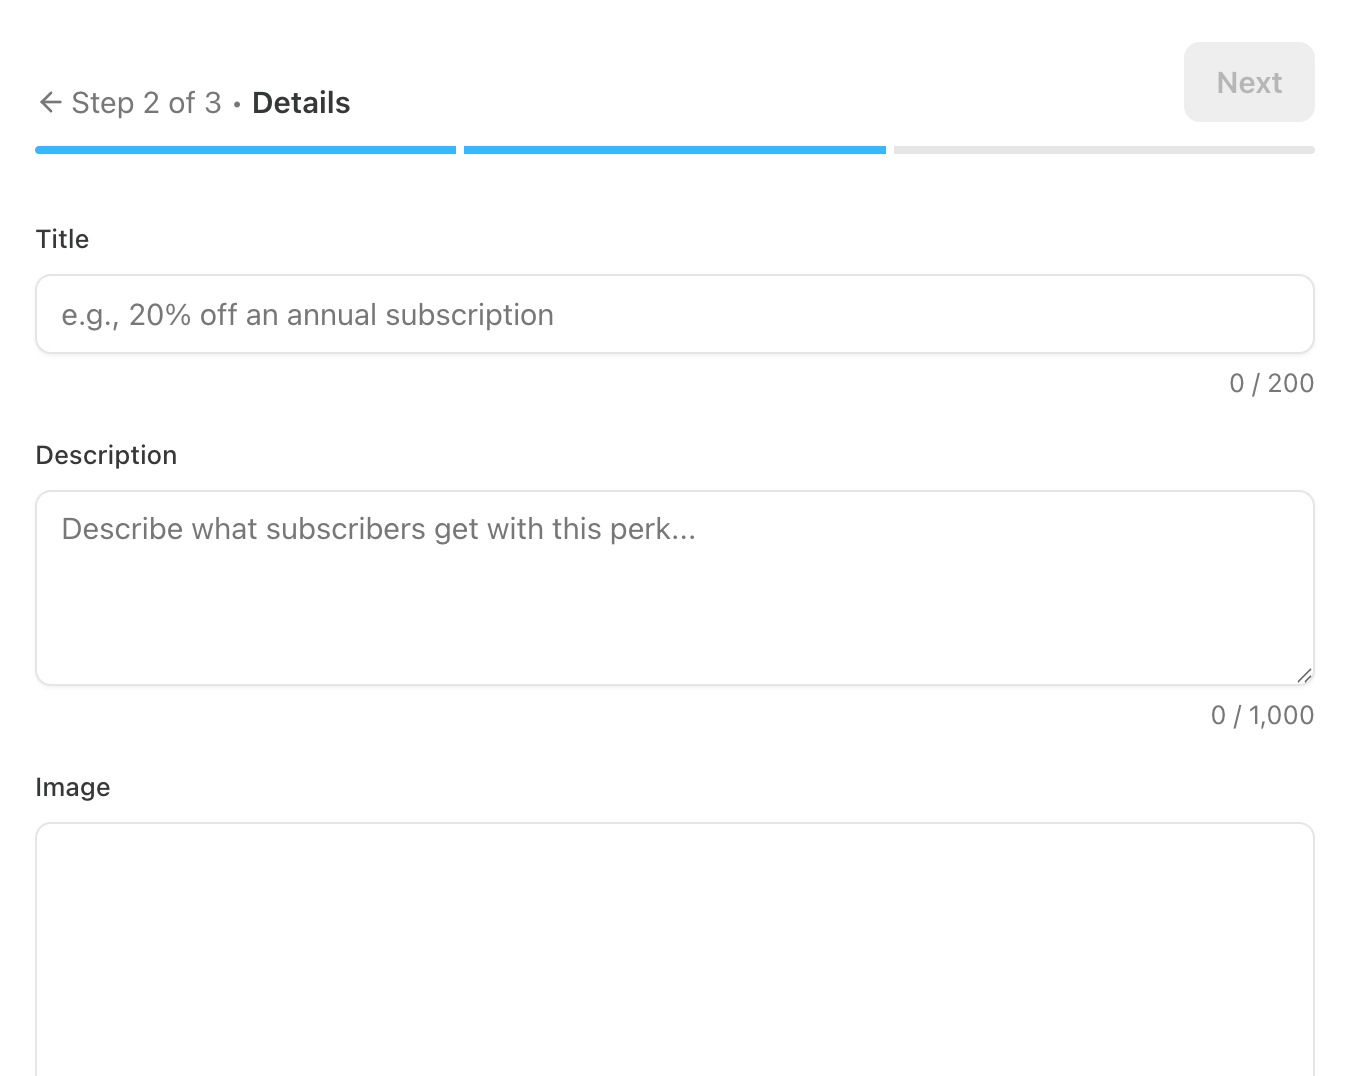
The title can run to 200 characters and the description to 1,000, but claiming a perk is usually an impulse decision. Your reader scans the card in a second or two and either taps the button or scrolls. So the copy needs to be sharp and clear. Don’t fill the character count just because it’s there. Use what you need to make the value obvious, and cut the rest.
The image needs to be 1,200 by 800 pixels, and you can build it in any tool you like. We use Canva for most of our visuals. Design one clean, branded template and reuse it across every card. That’s what makes the page read like a real product page instead of a pile of random resources.
Step 3: Choose the audience
This is where the gating happens. You can open the perk to all paid subscribers, to annual and founding only, or to founding only. Pick the tier this perk belongs to based on the structure above.
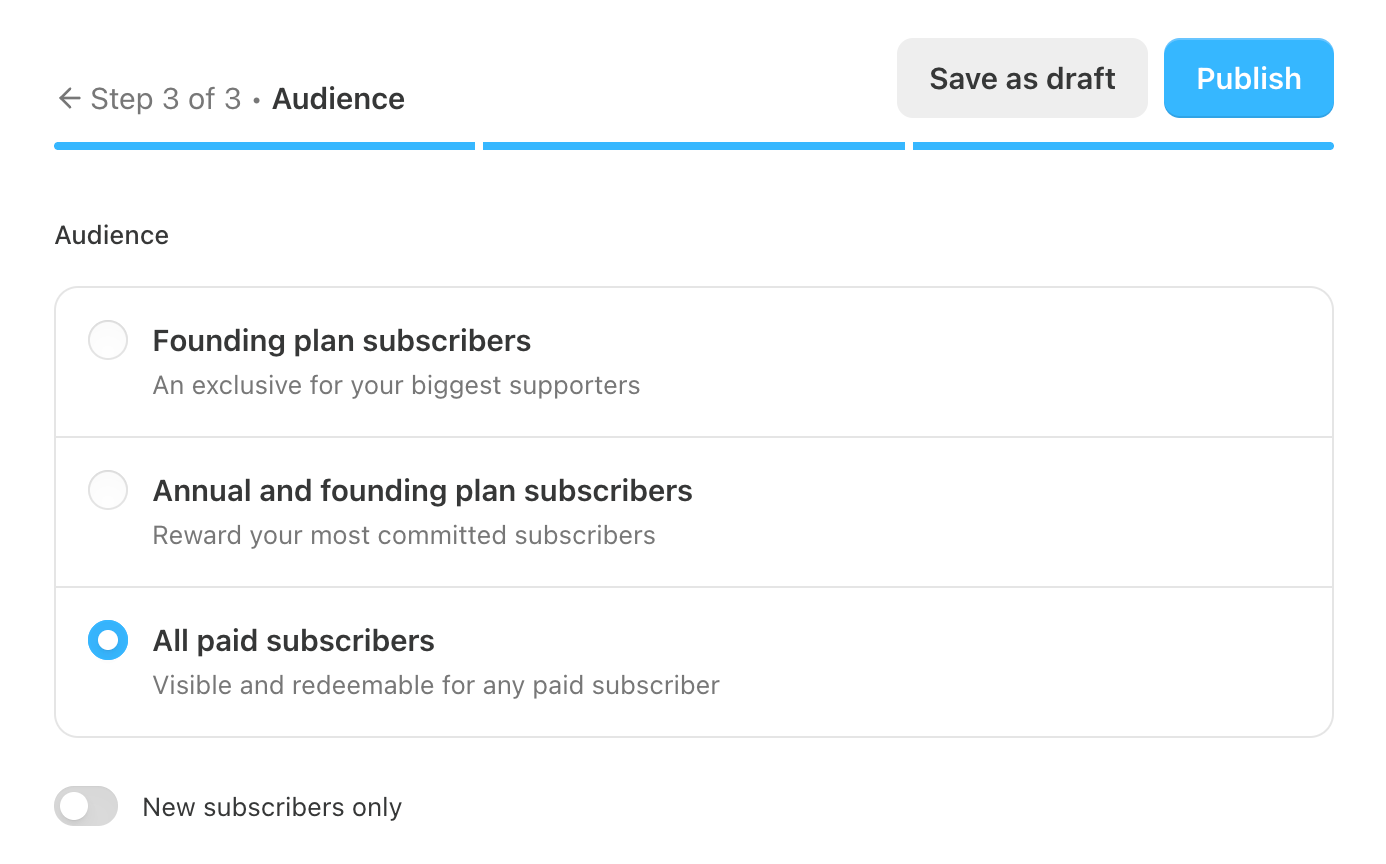
Click publish, and it goes live on your Perks page immediately.
What to actually put behind your perks
Knowing the mechanics is one thing. Sitting in front of a blank Perks page with no ideas is another, and that’s where most creators stall. So here’s the menu of what tends to work.
If you already have digital products, start there. Any downloadable resource sitting on your hard drive that took real time to make is a perk.
If you’ve built a private community somewhere, that community is a perk. Anything where people gather around a specific topic can be gated this way.
If you run discounts on your own products or partner with other businesses, those codes are perks. A 20% off code on your Gumroad course, a discount to a partner publication, a code for software you genuinely recommend.
If you host live sessions or masterclasses, those become perks too. Gating a Substack Live behind a tier turns a regular live into a real reason to upgrade.
And if you’ve got deep knowledge you haven’t packaged into anything yet, this is the fastest reason to start. A one-page cheat sheet for the thing your audience keeps asking about, a swipe file, a template you use for your own work. Those take an afternoon to build and can go live as a perk the same day.
The rule is simple: Start with one perk. Pick the thing readers ask you about most often in comments or DMs, build the smallest useful version of a solution, and add it. Then build the next one when you have time. You don’t need 10 perks on day one. You need one that’s genuinely useful, and the habit of adding to it whenever you make something your audience will value.
The part most creators miss: Perks keeps members, too
Setting up the perks is most of the work. Using them well is what makes the work pay off, and it comes down to where the page lives and how often you point people back to it. Once your perks are live, they appear on a new Perks tab in your publication’s navigation bar.
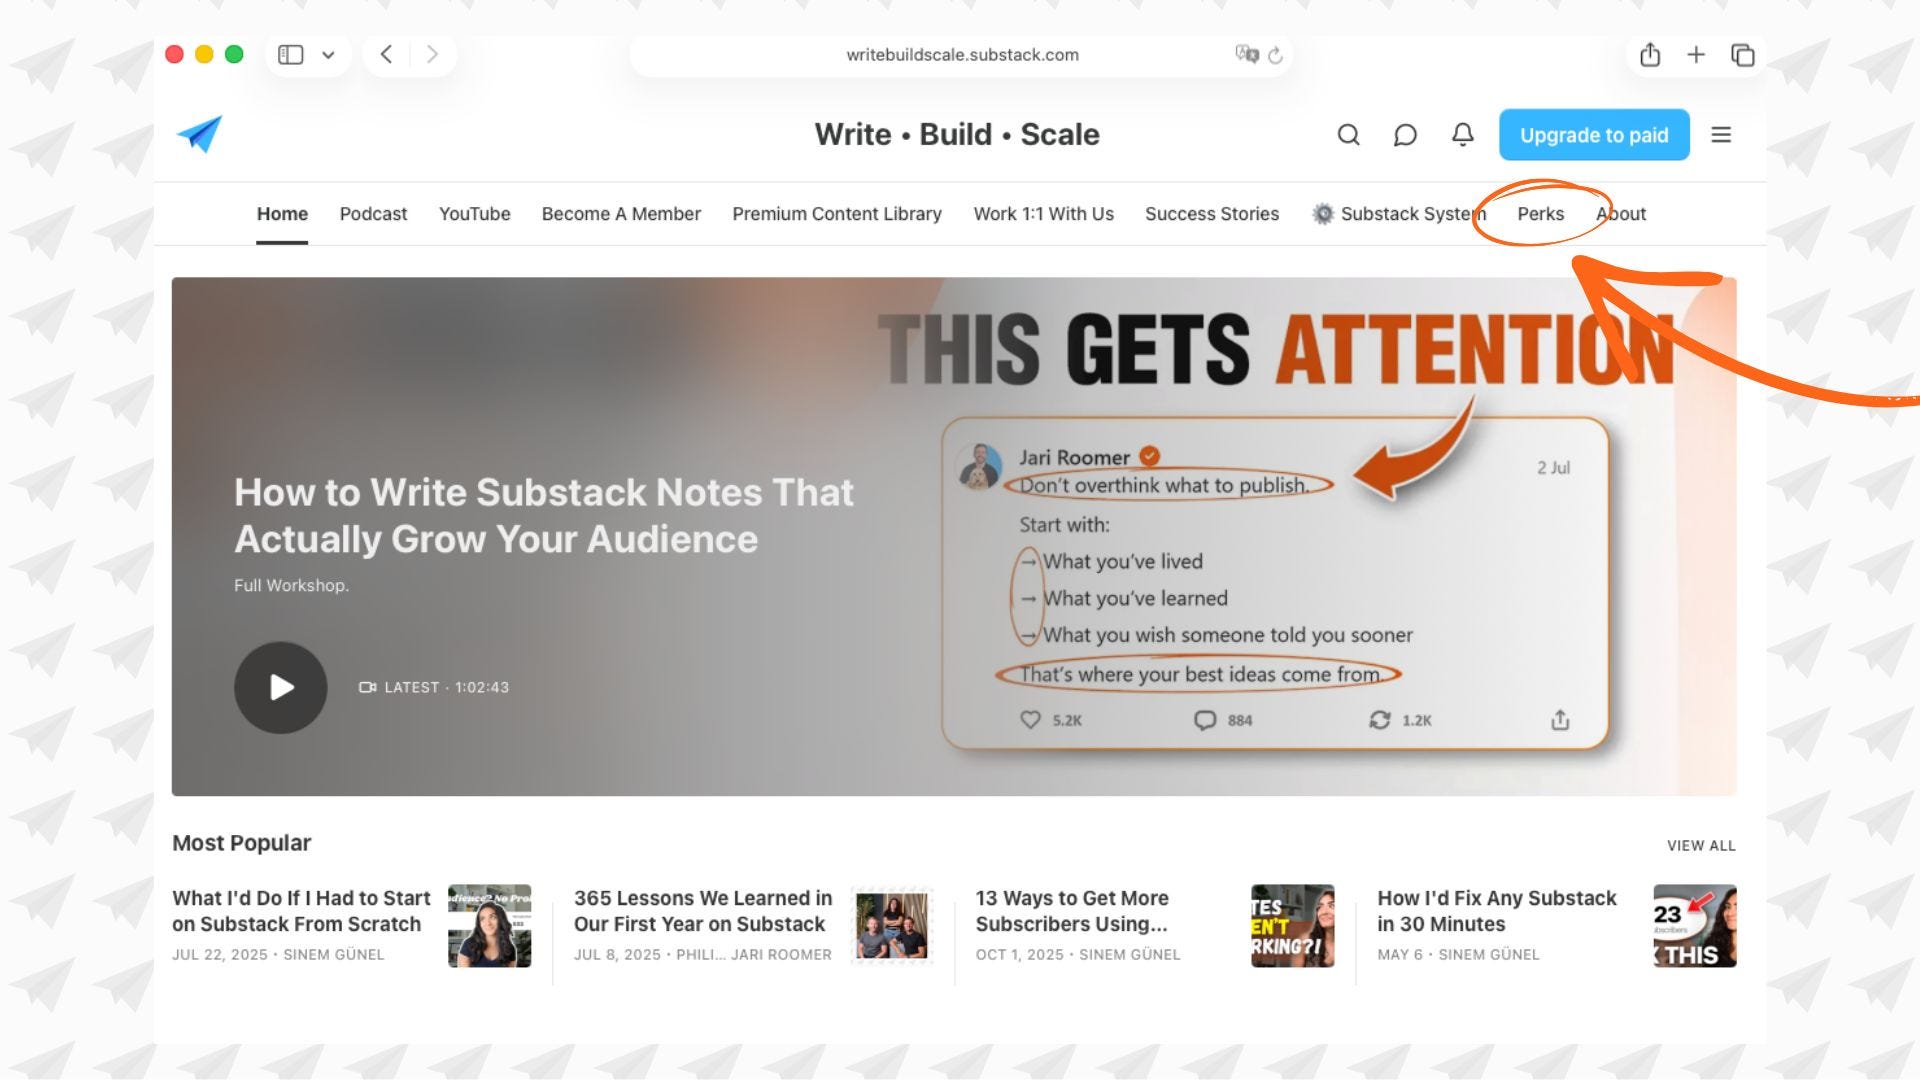
Anyone visiting can see it, click it, and browse your rewards. That’s the discovery layer, running for you in the background.
The bigger opportunity is baking Perks into your welcome email. That email is one of the most-opened messages you’ll ever send.
Adding a single line, “if you’re already a paid member, here’s your Perks page,” or “here’s what you get when you upgrade,” turns your welcome sequence into a soft conversion moment for every new subscriber.
Here’s the reframe most creators miss: Perks isn’t only a conversion tool. It’s a retention tool.
Think about how most paid memberships go: Someone upgrades, gets a burst of value in the first few weeks, then slowly loses track of what they signed up for. That’s when cancellations start, and it’s rarely because the work got worse. It’s because they lost sight of everything they had access to.
Perks fixes that. You can send paid members back to the page regularly: In a post footer, a monthly reminder, the community chat.
Every time they land there, they see everything they own laid out in one place. The course, the templates, the codes, the community, the live sessions, all of it clearly labeled and visible.
That’s what turns a subscription into a real product in the reader’s mind. Instead of paying for “more articles,” they can see exactly why the fee is worth it.
And members who feel like they own something rarely cancel after a month or two.
Build the first version this week
If you want a paid tier people upgrade to and stay with, Perks is one of the highest-leverage things you can set up right now.
The first version can take an afternoon, and it changes how visitors see your publication, how new subscribers experience your welcome flow, and how existing members feel about staying. Start with one perk, match it to the tier where it fits, add to it over time, and point your members back to the page so they never lose sight of what they have.
If you want to go past the setup and build a Substack that generates real revenue on top of all this, that’s the work we do inside the Substack Accelerator.
It’s direct coaching from the Write • Build • Scale team, applied to your specific publication: Positioning, paid tier structure, launch strategy, and everything else that decides whether your publication stays a hobby or becomes a real income stream.
It’s application-based, because we only take people we’re confident we can get there. If that sounds like you, apply here: substackcoaching.com
What would you say is the difference between the Premium Content Library and Perks? I set up the Premium Content Library tab on my homepage and listed all the goodies that paid subscribers receive. So would Perks be something else? Like downloads?
This was helpful! Thank you! Workbook please.